DevOpsDays Amsterdam 2017: day zero (workshops)
Table of Contents
Before the regular DevOpsDays kicked off, there was a day filled with workshops.
Before we got started
While I was on my way to Amsterdam, I was reading up on my RSS feeds and ran across the most recent comic on turnoff.us. It was so appropriate that I decided to copy it here:
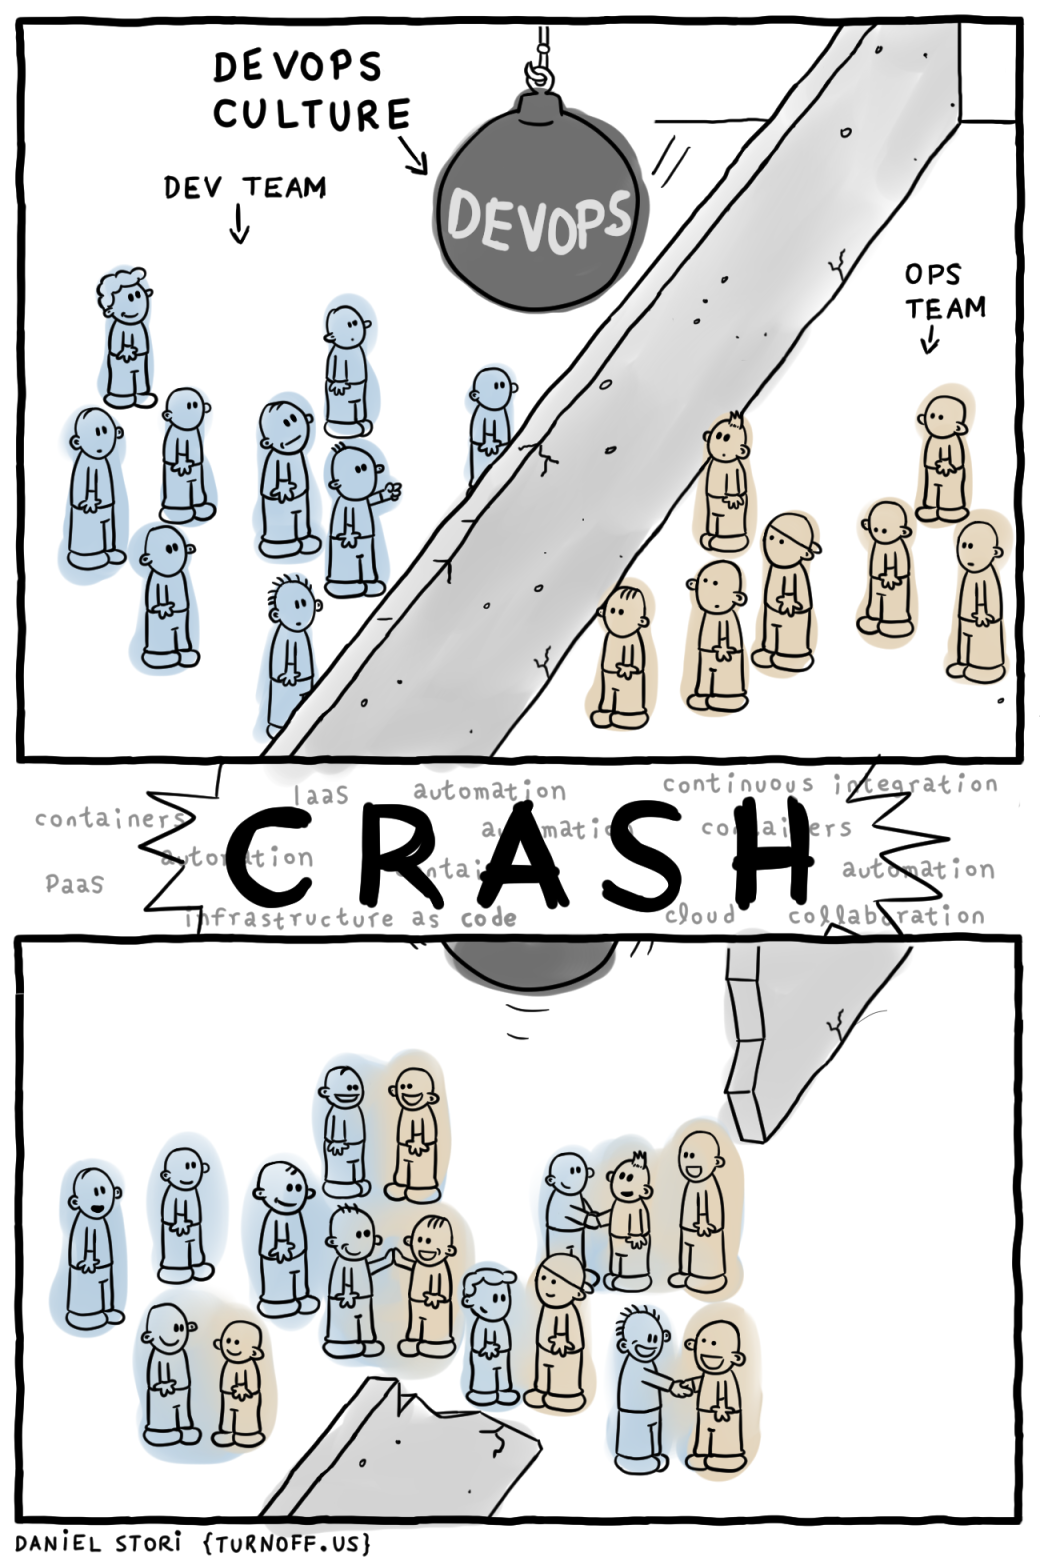
DevOps is not a Role — taken from turnoff.us and scaled down a bit. License: CC BY-NC-SA 4.0
Setup your own Ansible/Docker Workshop/Raising an Ansible Army — Arnab Sinha (TATA Consultancy Services)
Arnab wanted to be able to easily create lab environments for trainings. This workshop not only discusses how the lab is setup but also uses such a lab environment (in this case to provide an Ansible training environment).
The nature of the setup of the lab he used today: each participant got a control node and two managed nodes. Each node was in fact a Docker container which was managed by Ansible.
The first part of the workshop was basically an introduction to Ansible with topics like the history of Ansible and basic command line usage. Arnab demonstrated how to use a custom inventory file, limiting plays to a group or certain tasks (or skipping tasks) and how to syntax check your playbook.
A few examples:
$ ansible all -i "localhost," -c local -m shell -a whoami
$ ansible -i demo.ini all -m shell -a whoami -v
$ ansible-playbook playbook.yml --syntax-check
Some best practices:
- Use the
.iniextension for your inventory file. - Use a separate inventory file for each environment (develop, test, production, etc).
- Use tags so you can specify which tasks you want to run. (Use
“
ansible-playbook --list-tags playbook.yml” to show all available tags.)
In the category “today I learned”:
- Ansible has a pull mode (
ansible-pull). Who knew? :-) - Ansible comes with documentation:
ansible-doc. - Looping over sequences with
with_sequence(see the docs). - You can make a playbook executable by adding
#!/usr/bin/env ansible-playbookat the top (and using
chmod).
If you want to run your own lab, you can use Arnab’s GitHub repo: arnabsinha4u/ansible-traininglab. Note that this assumes a CentOS host.
In order to be able to log in to the “master” node (via ssh ansiblelabuser1@localhost) I had to enable PasswordAuthentication
in /etc/ssh/sshd_config. But since I had run the Ansible playbook
already, I was not allowed to change that file. I first had to run
this command:
$ chattr -i /etc/ssh/sshd_config
Other GitHub repos from Arnab that you can use:
Introduction To Kubernetes — Andy Repton (Schuberg Philis)
Kubernetes is a container orchestration platform. It has a huge open source backing and new features are being built quickly. It does one thing (in an elegant way).
Kubernetes has three main components:
- Masters: the brains of the cluster. Consists of: Apiserver, controller manager, scheduler.
- Nodes: the brains of individual nodes. Consists of: kubelet, kube proxy.
- etcd: replicated key/value store; the state store and clustering manager of kubernetes.
When you look at it from a ‘physical’ perspective, you have a Kubernetes node and this node runs Docker, which in turn runs the containers. Pods are a logical wrapper around containers; we don’t care about nodes.
Pods are mortal. What this means is that processes are expected to die. But we do not care because Kubernetes ensures availability by making sure that there are enough of them running.
During the workshop we used the following GitHub repo: Seth-Karlo/intro-to-kubernetes-workshop.
The pod you can create with the pod/pod.yml file can be used for a
toolbox to examine other pods.
More terminology: a replica set is basically a way of saying “make sure there are N copies of a pod.” If you look at the specification of a replica set, you can see that it contains a Pod spec.
Using the readinessProbe directive you can make sure that a
container does not receive traffic until it is actually ready. Note
that this is different from Docker’s health check which is meant to
determine if a container is still working or should be killed.
With the replica set example in aforementioned repo, Kubernetes will automatically start a pod again if it is killed. Even if you kill a pod yourself—Kubernetes doesn’t care why it has gone down.
If you edit a replica set (e.g. to update to a newer version of an image), it has no immediate impact because the pod spec is nested. Deployments can enforce changes are being executed though.
To get the whole configuration of a pod, including the default and not just the stuff we specified, run:
$ kubectl get pod <podname> -o yaml
Note that volumeMounts appear by default on every pod you create.
Secrets, although the name implies something different, are not encrypted; all pods in the same namespace can access the secret and decode it (base64). It is an easy way to put information in a pod, it is not secure!
Services don’t “exist” like containers do. A service is a purely logical idea. A service exposes pods to other pods.
A service automatically gets a DNS entry: <service name>.<namespace name>. This means that from inside your containers, you can use DNS
to access other containers.
Andy with his fresh WordPress installation
About scheduling:
- You can label nodes and then make sure that pods are scheduled on nodes with a certain label.
- Kubernetes will distribute pods across nodes as ‘evenly’ as possible.
- Kubernetes will not auto reschedule pods when you add a new node.
For this workshop we used kops
because it was easier. At Schuberg Philis they actually use Terraform
to manage their cluster(s). Note that you can use a flag and then
kops will spit out Terraform code.
If you are worried about your pods going down gracefully, you are doing your pods wrong.
If your application depends on long running processes: don’t use Kubernetes. Use the right tool for the right application.
Combine containers inside pods if latency matters, if they need to share configuration files or if they need to connect via loopback device.
Miscellaneous:
- Kompose: a tool to convert Docker Compose files to Kubernetes YAML files.
- With horizontal pod autoscaling you can automatically scale up/down the number of pods to handle load.
- You can set limits on your pods so Kubernetes will kill it off when it goes over the limits, e.g when it uses too much memory.
Resources:
Hands-On OpenShift Developer Workshop (In Azure) — Alessandro Vozza (Microsoft) & Samuel Terburg (Red Hat)
Why OpenShift: because developers need a platform to be able to deploy their applications. OpenShift is a platform to run your containers at scale. Meant for enterprise: not necessarily the latest features, but focus on stability.
OpenShift was originally written in Ruby, but it has been rewritten in Go and it is built upon Kubernetes. Openshift is always one release (circa three months) behind on Kubernetes.
Everything you can deploy in Kubernetes, you can deploy on OpenShift.
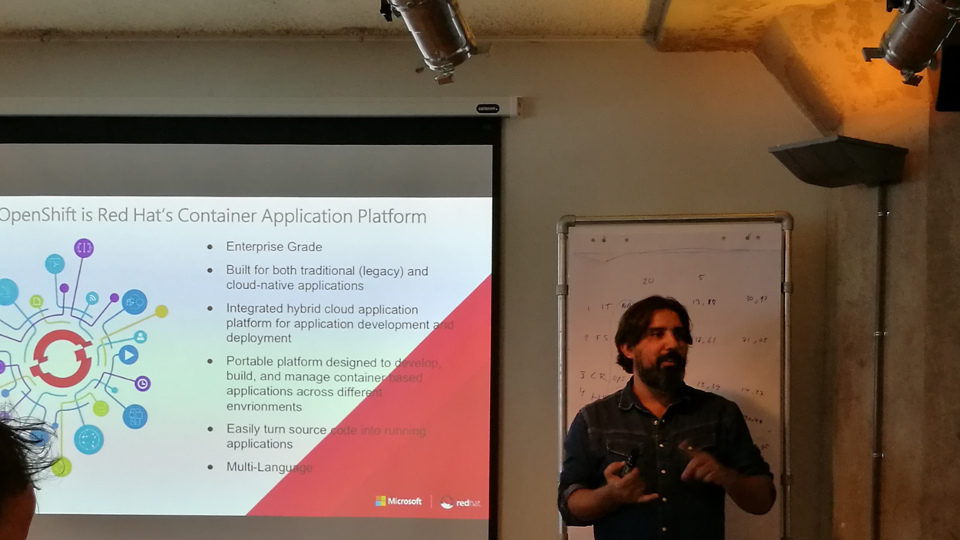
Alessandro explaining what OpenShift is
OpenShift Origin is community supported. If you want a commercially supported version, you have to run on Red Hat Enterprise Linux (RHEL). Red Hat OpenShift uses RHEL images, where OpenShift Origin uses CentOS.
OpenShift Online runs on AWS, but you can for instance also run it on bare metal if you want. But public clouds are a more natural fit for cloud-native applications.
Pods are the orchestrated units in OpenShift. Containers in a pod can talk to each other via localhost and local sockets. The security boundary is extended from the container to the pod. Containers can see each others processes and files. You only want to run one process in a container though.
A service can be seen as a sort of load balancer to redirect traffic to
the right pods. Internally it is using iptables.
OpenShift provides its own Docker registry which you can use if you want to.
OpenShift has solved the persistent storage problem before Kubernetes did. You can use the native storage for your solution (e.g. EBS for AWS). Note that block storage solutions require mounting/unmounting and thus takes a little longer.
As with Kubernetes, there is no built-in autoscale for OpenShift. Red Hat CloudForms can monitor your cluster and do the scaling for you.
The routing layer is your entrypoint into the cluster. It’s based on HAProxy. Comparable with Kubernetes' Ingress.
RHEL Atomic is a minimalistic OS designed to run Docker containers. (It is similar to CoreOS, but Red Hat wanted to have its own OS.) Everything you want to run has to run in a container. You can install OpenShift on RHEL Atomic.
Fun fact: you can create resources in Azure with Ansible.
Unfortunately there were some problems with the Red Hat OpenShift Azure Test Drive. As an alternative I used minishift to run OpenShift on my laptop. With it, I could work on the workshop.
Further reading: